'Python' 카테고리의 다른 글
| [Python] konlpy 형태소 분석 (0) | 2024.03.22 |
|---|---|
| [Python] 판다스 Pandas (1) | 2024.03.21 |
| [Python] 유튜브 크롤링(2) (0) | 2024.03.20 |
| [Python] 유튜브 크롤링(1) (0) | 2024.03.19 |
| [Python] Selenium 소개 및 사용법 (0) | 2024.03.18 |
| [Python] konlpy 형태소 분석 (0) | 2024.03.22 |
|---|---|
| [Python] 판다스 Pandas (1) | 2024.03.21 |
| [Python] 유튜브 크롤링(2) (0) | 2024.03.20 |
| [Python] 유튜브 크롤링(1) (0) | 2024.03.19 |
| [Python] Selenium 소개 및 사용법 (0) | 2024.03.18 |
| 오늘의 블로그 (0) | 2024.04.03 |
|---|---|
| [Python] 판다스 Pandas (1) | 2024.03.21 |
| [Python] 유튜브 크롤링(2) (0) | 2024.03.20 |
| [Python] 유튜브 크롤링(1) (0) | 2024.03.19 |
| [Python] Selenium 소개 및 사용법 (0) | 2024.03.18 |
<aside> 💡 이번 차시의 학습목표
✔ 판다스 기본 기능 이해
✔ 시리즈, 데이터프레임 기초 문법 이해
</aside>

# 설치
>> pip install pandas

# 사용
import pandas as pdscore_korean = pd.Series([98, 76, 60, 85, 80])
print(score_korean)score_korean = pd.Series([98, 76, 60, 85, 80], index=[1, 2, 3, 4, 5])
print(score_korean)score_korean = pd.Series([98, 76, 60, 85, 80], index=range(1,6))
print(score_korean)student_number = [1, 2, 3, 4, 5]korean_list = [98, 76, 60, 85, 80]
score_korean = pd.Series([98, 76, 60, 85, 80], index=student_number)english_list = [88, 92, 100, 55, 70]
score_english = pd.Series(english_list, index=student_number)total = score_korean + score_englishscore_math = pd.Series([30, 20, 10, 40, 50], index=[3, 2, 1, 4, 5])print(score_math.sort_index())total = score_korean + score_english + score_math# 인덱스 기준 오름차순 정렬
print(total.sort_index())
# 인덱스 기준 내림차순 정렬
print(total.sort_index(ascending=False))
# 값 기준 오름차순 정렬
print(total.sort_values())
# 값 기준 내림차수 정렬
print(total.sort_values(ascending=False))
📥실습 코드
ex01_pandas_01.py
import pandas as pd
# Series 생성
# 국어성적 정보
score_korean = pd.Series([98, 76, 60, 85, 80])
print(score_korean)
# 인덱스를 지정하여 Series 생성
score_korean = pd.Series([98, 76, 60, 85, 80], index=[1, 2, 3, 4, 5])
print(score_korean)
# range 함수 활용
score_korean = pd.Series([98, 76, 60, 85, 80], index=range(1,6))
print(score_korean)
# index 값 따로 선언 후 활용
student_number = [1, 2, 3, 4, 5]
score_korean = pd.Series([98, 76, 60, 85, 80], index=student_number)
print(score_korean)
# 성적 데이터도 리스트로 선언하여 활용 가능
korean_list = [98, 76, 60, 85, 80]
score_korean = pd.Series(korean_list, index=student_number)
print(score_korean)
# 영어 성적 추가
english_list = [88, 92, 100, 55, 70]
score_english = pd.Series(english_list, index=student_number)
print(score_english)
# 국어, 영어 학생별 성적 합산
total = score_korean + score_english
print(total)
# 수학 성적 추가(인덱스 번호가 1~5로 순차적이지 않음)
score_math = pd.Series([30, 20, 10, 40, 50], index=[3, 2, 1, 4, 5])
print(score_math)
print(score_math.sort_index())
# 전체 성적 합산(pandas가 인덱스 별로 계산을 수행함)
total = score_korean + score_english + score_math
print(total)
# 인덱스 기준 오름차순 정렬
print(total.sort_index())
# 인덱스 기준 내림차순 정렬
print(total.sort_index(ascending=False))
# 값 기준 오름차순 정렬
print(total.sort_values())
# 값 기준 내림차순 정렬
print(total.sort_values(ascending=False))
| 1 | 김파이 | 96 | 88 | 10 |
| 2 | 이파이 | 76 | 92 | 20 |
| 3 | 박파이 | 60 | 100 | 30 |
| 4 | 최파이 | 85 | 55 | 40 |
| 5 | 정파이 | 80 | 70 | 50 |
pd.DataFrame(저장할데이터)ex02_panda_series_01.py
import pandas as pd
scores = pd.DataFrame([
[96, 76, 60, 85, 80], [88, 92, 100, 55, 70], [10, 20, 30, 40, 50]
])
print(scores)ex02_panda_dataframe_01.py
import pandas as pd
scores = pd.DataFrame([
[96, 88, 10], [76, 92, 20], [60, 100, 30], [85, 55, 40], [80, 70, 50]
])
print(scores)ex02_panda_dataframe_02.py
import pandas as pd
scores = pd.DataFrame([
[96, 76, 60, 85, 80], [88, 92, 100, 55, 70], [10, 20, 30, 40, 50]
], index=["국어", "영어", "수학"])
print(scores)
scores = pd.DataFrame([
[96, 88, 10], [76, 92, 20], [60, 100, 30], [85, 55, 40], [80, 70, 50]
], index=[1, 2, 3, 4, 5])
print(scores)ex02_panda_dataframe_03.py
import pandas as pd
scores = pd.DataFrame(
{
"국어": [96, 76, 60, 85, 80],
"영어": [88, 92, 100, 55, 70],
"수학": [10, 20, 30, 40, 50]
}, index=[1, 2, 3, 4, 5]
)
print(scores)ex02_panda_dataframe_04.py
import pandas as pd
scores_dict = {"국어": [96, 76, 60, 85, 80],
"영어": [88, 92, 100, 55, 70],
"수학": [10, 20, 30, 40, 50]}
scores = pd.DataFrame(scores_dict)
print(scores)
# 인덱스 지정
scores = pd.DataFrame(scores_dict, index=[1, 2, 3, 4, 5])
print(scores)데이터프레임이름[”추가할 열이름”] = 추가할데이터scores["이름"] = "김파이"scores["이름"] = ["김파이", "이파이", "박파이", "최파이", "정파이"]ex02_panda_dataframe_05.py
import pandas as pd
scores = pd.DataFrame(
{
"국어": [96, 76, 60, 85, 80],
"영어": [88, 92, 100, 55, 70],
"수학": [10, 20, 30, 40, 50]
}, index=[1, 2, 3, 4, 5]
)
print(scores)
# 데이터 하나만 지정
# scores["이름"] = "김파이"
# 데이터 모두 지정
scores["이름"] = ["김파이", "이파이", "박파이", "최파이", "정파이"]
print(scores)데이터프레임이름.loc['인덱스값'] = 추가할데이터scores.loc[6] = 100scores.loc[6] = [100, 100, 100, "조파이"]ex02_panda_dataframe_06.py
import pandas as pd
scores = pd.DataFrame(
{
"국어": [96, 76, 60, 85, 80],
"영어": [88, 92, 100, 55, 70],
"수학": [10, 20, 30, 40, 50],
"이름": ["김파이", "이파이", "박파이", "최파이", "정파이"]
}, index=[1, 2, 3, 4, 5]
)
print(scores)
# scores.loc[6] = 100
scores.loc[6] = [100, 100, 100, "조파이"]
print(scores)
scores = pd.DataFrame(
    {
        "이름": ["김파이", "이파이", "박파이", "최파이", "정파이", "조파이"],
        "국어": [96, 76, 60, 85, 80, 100],
        "영어": [88, 92, 100, 55, 70, 100],
        "수학": [10, 20, 30, 40, 50, 100],
    }, index=[1, 2, 3, 4, 5, 6]
)ex03_pandas_method_01.py
scores = pd.DataFrame(
{
"이름": ["김파이", "이파이", "박파이", "최파이", "정파이", "조파이"],
"국어": [96, 76, 60, 85, 80, 100],
"영어": [88, 92, 100, 55, 70, 100],
"수학": [10, 20, 30, 40, 50, 100],
}, index=[1, 2, 3, 4, 5, 6]
)
print(scores)
scores = pd.DataFrame(
{
"이름": ["김파이", "이파이", "박파이", "최파이", "정파이", "조파이"],
"국어": [96, 76, 60, 85, 80, 100],
"영어": [88, 92, 100, 55, 70, 100],
"수학": [10, 20, 30, 40, 50, 100],
}, index=[1, 2, 3, 4, 5, 6]
).transpose()
print(scores)ex03_pandas_method_02.py
import pandas as pd
scores = pd.DataFrame(
{
"이름": ["김파이", "이파이", "박파이", "최파이", "정파이", "조파이"],
"국어": [96, 76, 60, 85, 80, 100],
"영어": [88, 92, 100, 55, 70, 100],
"수학": [10, 20, 30, 40, 50, 100],
}, index=[1, 2, 3, 4, 5, 6]
)
print(scores.sort_index())
# index 기준 오름차순 정렬
print(scores.sort_index(ascending=True))
# index 기준 내림차순 정렬
print(scores.sort_index(ascending=False))ex03_pandas_method_03.py
import pandas as pd
scores = pd.DataFrame(
{
"이름": ["김파이", "이파이", "박파이", "최파이", "정파이", "조파이"],
"국어": [96, 76, 60, 85, 80, 100],
"영어": [88, 92, 100, 55, 70, 100],
"수학": [10, 20, 30, 40, 50, 100],
}, index=[1, 2, 3, 4, 5, 6]
)
print(scores)
# 이름 기준 오름차순 정렬
print(scores.sort_values(by="이름", ascending=True))
# 이름 기준 내림차순 정렬
print(scores.sort_values(by="이름", ascending=False))
# 수학 기준 오름차순 정렬
print(scores.sort_values(by="수학", ascending=True))ex03_pandas_method_04.py
import pandas as pd
scores = pd.DataFrame(
{
"이름": ["김파이", "이파이", "박파이", "최파이", "정파이", "조파이"],
"국어": [96, 76, 60, 85, 80, 100],
"영어": [88, 92, 100, 55, 70, 100],
"수학": [10, 20, 30, 40, 50, 100],
}, index=[1, 2, 3, 4, 5, 6]
)
print(scores)
# 처음 2줄만 조회
print(scores.head(2))
# 마지막 2줄만 조회
print(scores.tail(2))
ex04_pandas_csv.py

import pandas as pd

scores = pd.DataFrame(
    {
        "이름": ["김파이", "이파이", "박파이", "최파이", "정파이", "조파이"],
        "국어": [96, 76, 60, 85, 80, 100],
        "영어": [88, 92, 100, 55, 70, 100],
        "수학": [10, 20, 30, 40, 50, 100],
    }, index=[1, 2, 3, 4, 5, 6]
)

# 현재폴더에 scores.csv 라는 이름으로 파일 생성
scores.to_csv("./scores.csv", encoding="utf-8-sig")
💡 이번 차시의 학습목표
✔ 인기급상승 동영상의 제목, 조회수 csv 파일로 저장
✔ 조회수 기준 내림차순으로 정렬하여 저장
driver = webdriver.Chrome()
driver.get("<https://www.youtube.com/feed/trending>")
time.sleep(2)
elements = driver.find_elements(By.XPATH, '//*[@id="video-title"]')
time.sleep(2)
hits_list = []
title_list = []
for element in elements:
if element.get_attribute("aria-label"):
hits_text = element.get_attribute("aria-label")
start_index = hits_text.rfind("조회수")+4
end_index = hits_text.rfind("회")
hits = hits_text[start_index:end_index]
hits = int(hits.replace(",", ""))
title_list.append(element.text)
hits_list.append(hits)
else:
print("조회수 데이터 없음")crawling_result = {
"title": title_list,
"hits": hits_list
}dataFrame = pd.DataFrame(title_list)
dataFrame.to_csv("result.csv", encoding="utf-8-sig")
dataFrame.sort_values(by=["hits"], ascending=False).to_csv("result.csv", encoding="utf-8-sig")
| 오늘의 블로그 (0) | 2024.04.03 |
|---|---|
| [Python] konlpy 형태소 분석 (0) | 2024.03.22 |
| [Python] 유튜브 크롤링(2) (0) | 2024.03.20 |
| [Python] 유튜브 크롤링(1) (0) | 2024.03.19 |
| [Python] Selenium 소개 및 사용법 (0) | 2024.03.18 |
💡 이번 차시의 학습목표
✔ 현재 창의 높이 확인하기 위한 javascript 문법
✔ 스크롤을 제어하기 위한 javascript 문법
✔ selenium으로 javascript 문법 활용하여 스크롤 제어 하기
document.documentElement.scrollHeight

driver.execute_script("document.documentElement.scrollHeight")h1 = driver.execute_script("return document.documentElement.scrollHeight") print(h1)
📥실습 코드
ex01_scroll.py

from selenium import webdriver

driver = webdriver.Chrome()
driver.get("<https://www.youtube.com/>")
# driver.execute_script("document.documentElement.scrollHeight")
h1 = driver.execute_script("return document.documentElement.scrollHeight")
print(h1)
window.scrollTo(0, 30)
window.scrollTo(0, 100)
window.scrollTo(0, 1000)window.scrollTo(0, document.documentElement.scrollHeight)# 처음 페이지 높이 가져오기
h1 = driver.execute_script("return document.documentElement.scrollHeight")
print(h1)
# 페이지 높이 만큼 스크롤 내리기
driver.execute_script("window.scrollTo(0, document.documentElement.scrollHeight)")# 처음 페이지 높이 가져오기
h1 = driver.execute_script("return document.documentElement.scrollHeight")
print(h1)
# 페이지 높이 만큼 스크롤 내리기
driver.execute_script("window.scrollTo(0, document.documentElement.scrollHeight)")
# 약간의 로딩시간
time.sleep(2)
# 스크롤을 한 번 내린 뒤의 페이지 높이 가져오기
h2 = driver.execute_script("return document.documentElement.scrollHeight")
print(h2)
# 두번째 스크롤 내리는 동작
driver.execute_script("window.scrollTo(0,document.documentElement.scrollHeight)")
time.sleep(2)
# 두 번 스크롤 내린 뒤의 페이지 높이 가져오기
h3 = driver.execute_script("return document.documentElement.scrollHeight")
print(h3)
time.sleep(3)
📥실습 코드
ex02_scroll.py
from selenium import webdriver
import time
driver = webdriver.Chrome()
driver.get("<https://www.youtube.com/>")
# 처음 페이지 높이 가져오기
h1 = driver.execute_script("return document.documentElement.scrollHeight")
print(h1)
# 페이지 높이 만큼 스크롤 내리기
driver.execute_script("window.scrollTo(0, document.documentElement.scrollHeight)")
# 약간의 로딩시간
time.sleep(2)
# 스크롤을 한 번 내린 뒤의 페이지 높이 가져오기
h2 = driver.execute_script("return document.documentElement.scrollHeight")
print(h2)
# 두번째 스크롤 내리는 동작
driver.execute_script("window.scrollTo(0,document.documentElement.scrollHeight)")
time.sleep(2)
# 두 번 스크롤 내린 뒤의 페이지 높이 가져오기
h3 = driver.execute_script("return document.documentElement.scrollHeight")
print(h3)
time.sleep(3)
💡 이번 차시의 학습목표
✔ 무한 스크롤을 이용하여 유튜브 영상 목록을 모두 불러옴
✔ 영상의 제목 크롤링
while True:
	# 반복문 내용
if before_scroll_height == after_scroll_height:
        break
<aside> 📌 실습코드는 코드박스에서 확인해주세요!
</aside>
📥실습 코드
ex01_scroll.py

from selenium import webdriver
import time

driver = webdriver.Chrome()
driver.get("<https://www.youtube.com/>")

while True:
    before_scroll_height = driver.execute_script("return document.documentElement.scrollHeight")
    driver.execute_script("window.scrollTo(0, document.documentElement.scrollHeight)")
    time.sleep(2)
    after_scroll_height = driver.execute_script("return document.documentElement.scrollHeight")
    time.sleep(2)
    if before_scroll_height == after_scroll_height:
        break
    # else:
    #     before_scroll_height = after_scroll_height

time.sleep(10)
titles = driver.find_elements(By.XPATH, '//*[@id="video-title"]')
print("영상 갯수: ", len(titles))
for title in titles:
    print(title.text)
ex02_scroll_function_01.py

from selenium import webdriver
import time
from selenium.webdriver.common.by import By

driver = webdriver.Chrome()
driver.get("https://www.youtube.com/")

def scroll():
    while True:
        before_scroll_height = driver.execute_script("return document.documentElement.scrollHeight")
        driver.execute_script("window.scrollTo(0, document.documentElement.scrollHeight)")
        time.sleep(2)
        after_scroll_height = driver.execute_script("return document.documentElement.scrollHeight")
        time.sleep(2)
        if before_scroll_height == after_scroll_height:
            break
    time.sleep(2)

scroll()
titles = driver.find_elements(By.XPATH, '//*[@id="video-title"]')
print("영상 갯수: ", len(titles))
for title in titles:
print(title.text)ex02_scroll_function_02.py
from selenium import webdriver
import time
from selenium.webdriver.common.by import By
driver = webdriver.Chrome()
driver.get("https://www.youtube.com/")
def scroll():
while True:
before_scroll_height = driver.execute_script("return document.documentElement.scrollHeight")
driver.execute_script("window.scrollTo(0, document.documentElement.scrollHeight)")
time.sleep(2)
after_scroll_height = driver.execute_script("return document.documentElement.scrollHeight")
time.sleep(2)
if before_scroll_height == after_scroll_height:
break
time.sleep(2)
titles = driver.find_elements(By.XPATH, '//*[@id="video-title"]')
print("영상 갯수: ", len(titles))
return titles
titles = scroll()
for title in titles:
print(title.text)💡 이번 차시의 학습목표
✔ 인기급상승 동영상 제목 크롤링
✔ 검색어 입력 후 필터 적용하여 제목 크롤링
ex01_trending.py

from selenium import webdriver
import time
from selenium.webdriver.common.by import By

driver = webdriver.Chrome()
driver.get("https://www.youtube.com/feed/trending")

def scroll():
    while True:
        before_scroll_height = driver.execute_script("return document.documentElement.scrollHeight")
        driver.execute_script("window.scrollTo(0, document.documentElement.scrollHeight)")
        time.sleep(2)
        after_scroll_height = driver.execute_script("return document.documentElement.scrollHeight")
        time.sleep(2)
        if before_scroll_height == after_scroll_height:
            break
    time.sleep(2)
    titles = driver.find_elements(By.XPATH, '//*[@id="video-title"]')
    print("영상 갯수: ", len(titles))
    return titles

titles = scroll()

for title in titles:
    print(title.text)

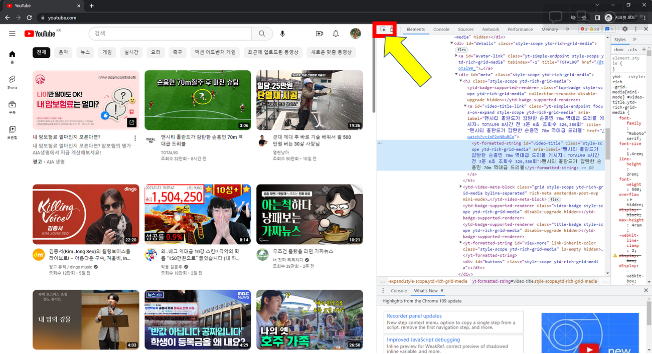
<ytd-toggle-button-renderer align-by-text="" class="style-scope ytd-search-sub-menu-renderer" button-renderer="true"><yt-button-shape><button class="yt-spec-button-shape-next yt-spec-button-shape-next--text yt-spec-button-shape-next--mono yt-spec-button-shape-next--size-m yt-spec-button-shape-next--icon-leading yt-spec-button-shape-next--align-by-text " aria-pressed="false" aria-label="검색 필터" style=""><div class="yt-spec-button-shape-next__icon" aria-hidden="true"><yt-icon style="width: 24px; height: 24px;"><svg viewBox="0 0 24 24" preserveAspectRatio="xMidYMid meet" focusable="false" class="style-scope yt-icon" style="pointer-events: none; display: block; width: 100%; height: 100%;"><g class="style-scope yt-icon"><path d="M15,17h6v1h-6V17z M11,17H3v1h8v2h1v-2v-1v-2h-1V17z M14,8h1V6V5V3h-1v2H3v1h11V8z M18,5v1h3V5H18z M6,14h1v-2v-1V9H6v2H3v1 h3V14z M10,12h11v-1H10V12z" class="style-scope yt-icon"></path></g></svg><!--css-build:shady--></yt-icon></div><div class="cbox yt-spec-button-shape-next--button-text-content"><span class="yt-core-attributed-string yt-core-attributed-string--white-space-no-wrap" role="text">필터</span></div><yt-touch-feedback-shape style="border-radius: inherit;"><div class="yt-spec-touch-feedback-shape yt-spec-touch-feedback-shape--touch-response" aria-hidden="true"><div class="yt-spec-touch-feedback-shape__stroke" style=""></div><div class="yt-spec-touch-feedback-shape__fill" style=""></div></div></yt-touch-feedback-shape></button></yt-button-shape>
<tp-yt-paper-tooltip fit-to-visible-bounds="" offset="8" role="tooltip" tabindex="-1" style="inset: 60px auto auto 7px;"><!--css-build:shady--><div id="tooltip" class="style-scope tp-yt-paper-tooltip hidden" style-target="tooltip">
검색 필터 열기
</div>
</tp-yt-paper-tooltip>
</ytd-toggle-button-renderer><a id="endpoint" class="yt-simple-endpoint style-scope ytd-search-filter-renderer" href="/results?search_query=%EB%89%B4%EC%A7%84%EC%8A%A4&sp=CAM%253D">
<div id="label" class="style-scope ytd-search-filter-renderer" title="조회수순 정렬">
<yt-formatted-string class="style-scope ytd-search-filter-renderer">조회수</yt-formatted-string>
<yt-icon id="dismiss-x" icon="yt-icons:dismissal" class="style-scope ytd-search-filter-renderer"><svg viewBox="0 0 24 24" preserveAspectRatio="xMidYMid meet" focusable="false" class="style-scope yt-icon" style="pointer-events: none; display: block; width: 100%; height: 100%;"><g class="style-scope yt-icon"><path d="M12.7,12l6.6,6.6l-0.7,0.7L12,12.7l-6.6,6.6l-0.7-0.7l6.6-6.6L4.6,5.4l0.7-0.7l6.6,6.6l6.6-6.6l0.7,0.7L12.7,12z" class="style-scope yt-icon"></path></g></svg><!--css-build:shady--></yt-icon>
</div>
</a>
# 영상에서의 코드
filter_button = driver.find_element(By.XPATH, '//*[@id="container"]/ytd-toggle-button-renderer')

# 수정된 코드
filter_button = driver.find_element(By.XPATH, '//*[@id="filter-button"]')

filter_button.click()
# 영상에서의 코드
hits_button = driver.find_element(By.XPATH, '/html/body/ytd-app/div[1]/ytd-page-manager/ytd-search/div[1]/ytd-two-column-search-results-renderer/div/ytd-section-list-renderer/div[1]/div[2]/ytd-search-sub-menu-renderer/div[1]/iron-collapse/div/ytd-search-filter-group-renderer[5]/ytd-search-filter-renderer[3]/a')

# 수정된 코드
hits_button = driver.find_element(By.XPATH, '/html/body/ytd-app/ytd-popup-container/tp-yt-paper-dialog/ytd-search-filter-options-dialog-renderer/div[2]/ytd-search-filter-group-renderer[5]/ytd-search-filter-renderer[3]/a')

hits_button.click()
<aside> 📌 실습코드는 코드박스에서 확인해주세요!
</aside>
📥실습 코드
ex02_search_filter.py

from selenium import webdriver
from selenium.webdriver.common.by import By
from selenium.webdriver.common.keys import Keys
import time

def scroll():
    while True:
        before_scroll_height = driver.execute_script("return document.documentElement.scrollHeight")
        driver.execute_script("window.scrollTo(0, document.documentElement.scrollHeight)")
        time.sleep(2)
        after_scroll_height = driver.execute_script("return document.documentElement.scrollHeight")
        time.sleep(2)
        if before_scroll_height == after_scroll_height:
            break
    time.sleep(2)
    titles = driver.find_elements(By.XPATH, '//*[@id="video-title"]')
    print("영상 갯수: ", len(titles))
    return titles

# 브라우저 실행
driver = webdriver.Chrome()
driver.get("<https://www.youtube.com/>")
search_input = driver.find_element(By.CSS_SELECTOR, "input#search")
search_input.send_keys("뉴진스")
# 검색버튼 클릭
search_button = driver.find_element(By.CSS_SELECTOR, "button#search-icon-legacy")
search_button.click()
time.sleep(2)
# 필터버튼 클릭
filter_button = driver.find_element(By.XPATH, '//*[@id="container"]/ytd-toggle-button-renderer')
filter_button.click()
time.sleep(2)
# 조회수 클릭
hits_button = driver.find_element(By.XPATH, '/html/body/ytd-app/div[1]/ytd-page-manager/ytd-search/div[1]/ytd-two-column-search-results-renderer/div/ytd-section-list-renderer/div[1]/div[2]/ytd-search-sub-menu-renderer/div[1]/iron-collapse/div/ytd-search-filter-group-renderer[5]/ytd-search-filter-renderer[3]/a')
hits_button.click()
time.sleep(2)
# 무한 스크롤 함수 호출
titles = scroll()

for title in titles:
    print(title.text)
💡 이번 차시의 학습목표
✔ 인기급상승 동영상을 크롤링하여 제목, 조회수 출력하기
✔ 제목, 조회수 따로 리스트에 저장하기

hits_text.rfind("조회수")hits_text.find("조회수")+4hits_text.find("회")start_index = hits_text.rfind("조회수")+4
end_index = hits_text.rfind("회")
print(hits_text[start_index:end_index])hits = hits_text[start_index:end_index]
hits = int(hits.replace(",", ""))
hits_list = []
title_list = []hits_text = element.get_attribute("aria-label")if element.get_attribute("aria-label"):hits_text = element.get_attribute("aria-label")
start_index = hits_text.rfind("조회수")+4
end_index = hits_text.rfind("회")
hits = hits_text[start_index:end_index]
hits = int(hits.replace(",", ""))
title_list.append(element.text)
hits_list.append(hits)for title, hits in zip(title_list, hits_list):
print(title, hits)
| [Python] konlpy 형태소 분석 (0) | 2024.03.22 |
|---|---|
| [Python] 판다스 Pandas (1) | 2024.03.21 |
| [Python] 유튜브 크롤링(1) (0) | 2024.03.19 |
| [Python] Selenium 소개 및 사용법 (0) | 2024.03.18 |
| [Python] 패키지 설치 및 numpy, matplotlib 기초 (0) | 2024.03.15 |
💡 이번 차시의 학습목표
✔ 크롤링 실습하기
📥실습 코드
ex01_crawling.py
from selenium import webdriver
from selenium.webdriver.common.by import By
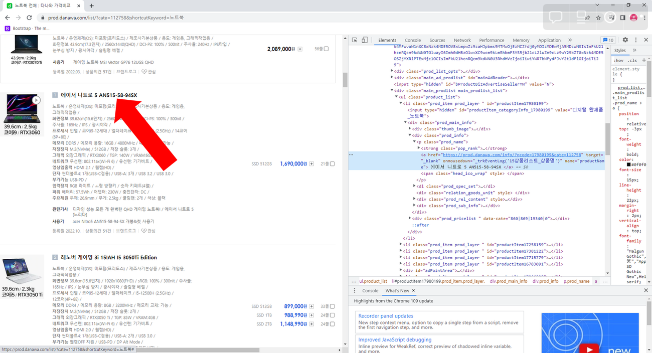
# 다나와 상품목록 크롤링
# 브라우저 실행
driver = webdriver.Chrome()
# 접속
driver.get("<https://prod.danawa.com/list/?cate=112758&shortcutKeyword=%EB%85%B8%ED%8A%B8%EB%B6%81>")
notebook_names = driver.find_elements(By.CSS_SELECTOR, '[name="productName"]')
# print(notebook_names)
for name in notebook_names:
# 코드값이 보임
# print(name)
# 텍스트 출력하기
print(name.text)
<a class="ContentTitle__title_area--x24vt" href="/webtoon/list?titleId=648419">
<span class="ContentTitle__title--e3qXt">뷰티풀 군바리</span></a>
📥실습 코드
ex02_crawling.py

from selenium import webdriver
from selenium.webdriver.common.by import By
import time

driver = webdriver.Chrome()
driver.get("<https://comic.naver.com/webtoon>")
time.sleep(2)
webtoon_titles = driver.find_elements(By.CLASS_NAME, 'ContentTitle__title_area--x24vt')
time.sleep(5)
for name in webtoon_titles:
    print(name.text)
print(len(webtoon_titles))
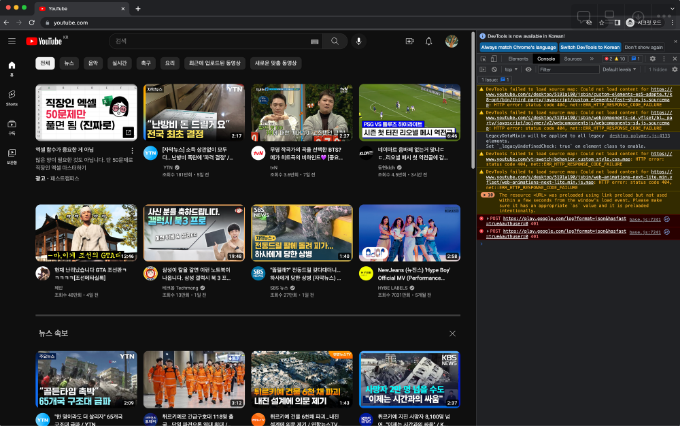
💡 이번 차시의 학습목표
✔ 유튜브 홈페이지 구성요소 확인
✔ 유튜브 영상 제목 크롤링 하기


<yt-formatted-string id="video-title" class="style-scope ytd-rich-grid-media" aria-label="54톤 거대 고래 뱃속에서 발견된 것은? [국경없는 영상] 게시자: YTN 2일 전 1분 54초 조회수 1,400,217회">54톤 거대 고래 뱃속에서 발견된 것은? [국경없는 영상]</yt-formatted-string>titles = driver.find_elements(By.ID, "video-title")titles = driver.find_elements(By.XPATH, '//*[@id="video-title"]')print(type(titles))
for title in titles:
print(title.text) print(title.tag_name) print(title.get_attribute("aria-label")
📥실습 코드
ex01_youtube.py

from selenium import webdriver
from selenium.webdriver.common.by import By

# 브라우저 실행
driver = webdriver.Chrome()
driver.get("<https://www.youtube.com/>")
# titles = driver.find_elements(By.ID, "video-title")
titles = driver.find_elements(By.XPATH, '//*[@id="video-title"]')
print(titles)
print(type(titles))
for title in titles:
    print(title.tag_name) # 태그 이름 가져오기
    print(title.text) # inner HTML 값 가져오기
    print(title.get_attribute("aria-label")) # 속성값 가져오기
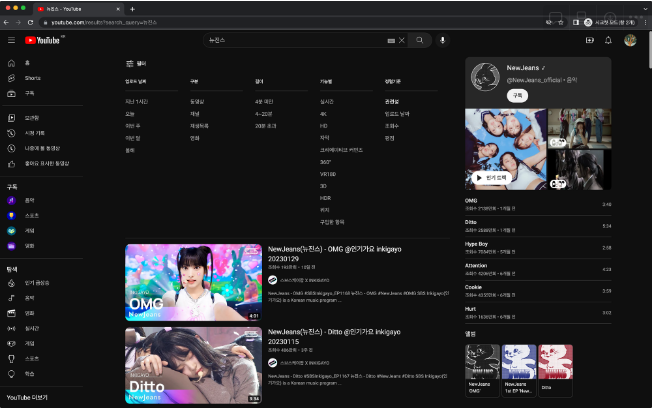
💡 이번 차시의 학습목표
✔ 검색어를 입력하여 검색된 영상의 제목 크롤링 하기
✔ selenium으로 검색창, 검색버튼 사용하기

driver.get("https://www.youtube.com/")
<input id="search" autocapitalize="none" autocomplete="off" autocorrect="off" name="search_query" tabindex="0" type="text" spellcheck="false" placeholder="검색" aria-label="검색" role="combobox" aria-haspopup="false" aria-autocomplete="list" class="gsfi ytd-searchbox" dir="ltr" style="border: none; padding: 0px; margin: 0px; height: auto; width: 100%; outline: none;">search_input = driver.find_element(By.CSS_SELECTOR, "input#search")search_input.send_keys("뉴진스")<button id="search-icon-legacy" class="style-scope ytd-searchbox" aria-label="검색">
<yt-icon class="style-scope ytd-searchbox"><svg viewBox="0 0 24 24" preserveAspectRatio="xMidYMid meet" focusable="false" class="style-scope yt-icon" style="pointer-events: none; display: block; width: 100%; height: 100%;"><g class="style-scope yt-icon"><path d="M20.87,20.17l-5.59-5.59C16.35,13.35,17,11.75,17,10c0-3.87-3.13-7-7-7s-7,3.13-7,7s3.13,7,7,7c1.75,0,3.35-0.65,4.58-1.71 l5.59,5.59L20.87,20.17z M10,16c-3.31,0-6-2.69-6-6s2.69-6,6-6s6,2.69,6,6S13.31,16,10,16z" class="style-scope yt-icon"></path></g></svg><!--css-build:shady--></yt-icon>
<tp-yt-paper-tooltip prefix="" class="style-scope ytd-searchbox" role="tooltip" tabindex="-1" style="left: 815.5px; top: 62px;"><!--css-build:shady--><div id="tooltip" class="style-scope tp-yt-paper-tooltip hidden" style-target="tooltip">
검색
</div>
</tp-yt-paper-tooltip>
</button>search_button = driver.find_element(By.CSS_SELECTOR, "button#search-icon-legacy")search_button.click()from selenium.webdriver.common.keys import Keyssearch_input.send_keys("뉴진스")
search_input.send_keys(Keys.RETURN)ex01_search.py
from selenium import webdriver
from selenium.webdriver.common.by import By
from selenium.webdriver.common.keys import Keys
import time
# 브라우저 실행
driver = webdriver.Chrome()
driver.get("https://www.youtube.com/")
search_input = driver.find_element(By.CSS_SELECTOR, "input#search")
# print(search_input.tag_name)
search_input.send_keys("뉴진스")
# 검색버튼 클릭
search_button = driver.find_element(By.CSS_SELECTOR, "button#search-icon-legacy")
search_button.click()
time.sleep(2)
# 엔터키 입력
# search_input.send_keys(Keys.RETURN)
titles = driver.find_elements(By.ID, "video-title")
for title in titles:
print(title.text)driver.get("https://www.youtube.com/results?search_query=뉴진스")ex02_search.py
from selenium import webdriver
from selenium.webdriver.common.by import By
from selenium.webdriver.common.keys import Keys
import time
driver = webdriver.Chrome()
driver.get("<https://www.youtube.com/results?search_query=뉴진스>")
titles = driver.find_elements(By.ID, "video-title")
for title in titles:
print(title.text)
q = input("검색어를 입력하세요: ")driver.get("<https://www.youtube.com/results?search_query=>"+q)ex03_search.py
from selenium import webdriver
from selenium.webdriver.common.by import By
from selenium.webdriver.common.keys import Keys
import time
q = input("검색어를 입력하세요: ")
driver = webdriver.Chrome()
driver.get("<https://www.youtube.com/results?search_query=>"+q)
titles = driver.find_elements(By.ID, "video-title")
for title in titles:
print(title.text)
| [Python] 판다스 Pandas (1) | 2024.03.21 |
|---|---|
| [Python] 유튜브 크롤링(2) (0) | 2024.03.20 |
| [Python] Selenium 소개 및 사용법 (0) | 2024.03.18 |
| [Python] 패키지 설치 및 numpy, matplotlib 기초 (0) | 2024.03.15 |
| [Python] 함수와 모듈 (0) | 2024.03.11 |
💡 이번 차시의 학습목표
✔ 크롤링 개념
✔ Selenium 소개 및 사용방법
✔ Selenium 시작하기
정적크롤링 동적크롤링
| 접근성 | 정해진 주소를 통해 일회성 접근 | 브라우저를 사용하여 주소 또는 페이지 이동 가능 |
| 크롤링 범위 | 열려있는 내용만 수집 가능 | 클릭, 텍스트 입력 등 동적인 활동이 가능하기 때문에 범위에 한계는 없음 |
| 속도 | 빠름 | 느림 |
ex01_selenium.py

# 브라우저(크롬) 실행
driver = webdriver.Chrome()
# 주소 입력(구글 홈페이지)
driver.get("https://www.google.com")
💡 이번 차시의 학습목표
✔ Selenium으로 웹페이지의 요소 가져오기
✔ find_element(), find_elements() 사용하기
✅selenium은 html의 다양한 요소에 접근할 수 있는 method를 제공함
✅해당 페이지의 id, class, 태그, css 선택자 등 거의 모든 요소에 접근 가능
✅요소에 접근하여 해당 요소의 속성, text 값 등을 가져올 수 있음
📥실습 코드
ex01_tag_01.py

driver = webdriver.Chrome()
driver.get("https://www.example.com")
# p 태그 요소 가져오기
p_element = driver.find_element(By.TAG_NAME, 'p')
print(p_element)
# 텍스트만 출력
print(p_element.text)ex01_tag_02.py
# p 태그 요소 모두 가져오기
p_elements = driver.find_elements(By.TAG_NAME, 'p')
print(p_elements)
# p_elements의 타입 확인
print(type(p_elements))
for p in p_elements:
print(p)
print(p.text)ex02_id.py
driver = webdriver.Chrome()
driver.get("https://www.python.org/")
id_element = driver.find_element(By.ID, 'site-map')
print(id_element)
print(id_element.text)ex03_class.py
driver.get("https://www.python.org/")
class_element = driver.find_elements(By.CLASS_NAME, 'main-content')
for c in class_element:
print(c.text)
💡 이번 차시의 학습목표
✔ xpath로 요소 접근하기
✔ selenium으로 키입력, 클릭 등 동적 제어하기


driver.get("<https://www.naver.com>")# 영상에서의 코드
login_button = driver.find_element(By.XPATH, '//*[@id="account"]/a')
# 수정된 코드
login_button = driver.find_element(By.XPATH, '//*[@id="account"]/div/a')
login_button.click()driver.get("<https://www.naver.com>")search = driver.find_element(By.XPATH, '//*[@id="query"]')search.send_keys("파이썬")# 영상에서의 코드
search_button = driver.find_element(By.XPATH, '//*[@id="search_btn"]')
# 수정된 코드
search_button = driver.find_element(By.XPATH, '//*[@id="search-btn"]')
search_button.click()
| [Python] 유튜브 크롤링(2) (0) | 2024.03.20 |
|---|---|
| [Python] 유튜브 크롤링(1) (0) | 2024.03.19 |
| [Python] 패키지 설치 및 numpy, matplotlib 기초 (0) | 2024.03.15 |
| [Python] 함수와 모듈 (0) | 2024.03.11 |
| [Python] 조건문과 반복문 (0) | 2024.03.08 |
💡 이번 차시의 학습목표
✔ 파이썬 패키지 설치
✔ numpy, matplotlib 기본 사용

>> pip install [패키지 이름]>> pip list📌 실습코드는 코드박스에서 확인해주세요!
📥실습 코드
# 설치
>> pip install numpy
# 사용
import numpy as npex01_numpy_01.py
import numpy as np
# 배열 선언
arr = np.array([2, 1, 5, 3, 7, 4, 6, 8])
print(arr)
# 정렬 함수 호출
arr = np.sort(arr)
print(arr)ex01_numpy_02.py
import numpy as np
# 배열 합치기
a = np.array([1, 2, 3, 4])
b = np.array([5, 6, 7, 8])
c = np.concatenate((a, b))
print(c)ex01_numpy_03.py
import numpy as np
# 배열 연산하기
a = np.array([1, 2, 3, 4])
print(a)
b = a + 10
print(b)
c = a - b
print(c)ex01_numpy_04.py
import numpy as np
# 배열 슬라이싱
a = np.array([1, 2, 3, 4, 5, 6, 7, 8, 9, 10])
print(a[:2]) # 0~1번 인덱스
print(a[1:2]) # 1~1번 인덱스
print(a[3:8]) # 3~7번 인덱스
print(a[6:]) # 6번 인덱스 부터 마지막ex01_numpy_04.py
import numpy as np
# 배열 슬라이싱
a = np.array([1, 2, 3, 4, 5, 6, 7, 8, 9, 10])
print(a[:2]) # 0~1번 인덱스
print(a[1:2]) # 1~1번 인덱스
print(a[3:8]) # 3~7번 인덱스
print(a[6:]) # 6번 인덱스 부터 마지막ex02_matplot_01.py
import matplotlib as mpl
import matplotlib.pyplot as plt
# plot(): 기본적인 x축, y축으로 구성된 2차원 그래프를 만들어주는 함수
# show(): 정의된 그래프 출력
# y축 값만 정의
plt.plot([1, 2, 3, 4])
plt.show()ex02_matplot_02.py
import matplotlib as mpl
import matplotlib.pyplot as plt
# x축, y축 값 함께 정의
# plt.plot([1, 2, 3, 4], [2, 5, 6, 10])
x_values = [1, 2, 3, 4]
y_values = [2, 5, 6, 10]
plt.plot(x_values, y_values)
# 축 label 표시하기
plt.xlabel("x axis label")
plt.ylabel("y axis label")
plt.show()ex02_matplot_03.py
import matplotlib as mpl
import matplotlib.pyplot as plt
x_values = [1, 2, 3, 4]
y_values = [2, 5, 6, 10]
# marker 표시(동그라미)
# plt.plot(x_values, y_values, "o")
# marker 표시(동그라미, 선)
# plt.plot(x_values, y_values, "o-")
# marker 표시(네모, 선)
# plt.plot(x_values, y_values, "s-")
# marker 표시(동그라미, 대시선)
# plt.plot(x_values, y_values, "o--")
plt.xlabel("x axis label")
plt.ylabel("y axis label")
plt.show()
💡 이번 차시의 학습목표
✔ HTML, CSS, javascript의 역할 이해
✔ HTML, CSS, javascript 기초문법 다뤄보기
<!DOCTYPE html>
<html lang="en">
<head>
<title>Document</title>
</head>
<body>
</body>
</html>ex01_basic.html
<!DOCTYPE html>
<html lang="en">
<head>
<title>Document</title>
</head>
<body>
안녕하세요
</body>
</html><h2>안녕하세요</h2>ex02_css.html
<!DOCTYPE html>
<html lang="en">
<head>
<title>Document</title>
<style>
h2 {
color: red;
}
</style>
</head>
<body>
<div>
<p>첫번째 div p 태그</p>
<h2>첫번째 div h2 태그</h2>
</div>
<div>
<h2>두번째 div h2 태그</h2>
<h3>두번째 div h3 태그</h3>
</div>
</body>
</html>div {
background-color: yellow;
}ex03_javascript.html
<!DOCTYPE html>
<html lang="en">
<head>
<title>Document</title>
<script>
function fun1() {
console.log("콘솔에 출력됩니다");
alert("안녕하세요");
}
</script>
</head>
<body>
<button onclick="fun1()">버튼</button>
</body>
</html>ex04_selector_01.html
<!DOCTYPE html>
<html lang="en">
<head>
<title>Document</title>
</head>
<body>
<div id="id1">
<p class="class1">첫번째 div p 태그</p>
<h2 class="class1">첫번째 div h2 태그</h2>
</div>
<div id="id2">
<h2 class="class1">두번째 div h2 태그</h2>
<h3 class="class2">두번째 div h3 태그</h3>
</div>
</body>
</html>ex04_selector_02.html
h2 {
color: red;
}
div {
background-color: yellow;
}ex04_selector_03.html
#id1 {
color: blue;
}
#id3 {
background-color: green;
}ex04_selector_04.html
.class1 {
color: red;
}
.class2 {
background-color: yellow;
}ex04_selector_05.html
/* id1이 적용된 요소 내의 h2 태그 요소 */
#id1 h2 {
color: blue;
}
/* id2가 적용된 요소 내의 class2 클래스가 적용된 요소 */
#id2 .class2 {
color: red;
}div#id1 {
color: blue;
}
<aside> 💡 이번 차시의 학습목표
✔ javascript DOM API 활용
✔ javascript로 스크롤 제어
✔브라우저 개발자도구 활용하기
</aside>

height = document.documentElement.scrollHeight;
console.log(height);
window.scrollTo(0, document.documentElement.scrollHeight)


height = document.documentElement.scrollHeight;
console.log(height);
window.scrollTo(0, document.documentElement.scrollHeight)

ele1 = document.getElementById("id1");
console.log(ele1);ele1 = document.getElementsByClassName("class2")
console.log(ele1);
console.log(ele1[0]);ele1 = document.getElementsByTagName("h2")
console.log(ele1);
console.log(ele1[0]);height = document.documentElement.scrollHeight;
console.log(height);body {
height: 3000px;
}height = document.documentElement.scrollHeight;
console.log(height);
window.scrollTo(0, document.documentElement.scrollHeight)


<img class="python-logo" src="/static/img/python-logo@2x.png" alt="python™" width="218" height="62">
| [Python] 유튜브 크롤링(1) (0) | 2024.03.19 |
|---|---|
| [Python] Selenium 소개 및 사용법 (0) | 2024.03.18 |
| [Python] 함수와 모듈 (0) | 2024.03.11 |
| [Python] 조건문과 반복문 (0) | 2024.03.08 |
| [Python] 파이썬 기본 문법 (0) | 2024.01.30 |
💡 이번 차시의 학습목표
✔ 함수의 의미, 함수 문법
✔ 함수 연습
✔ 사용자 정의 함수, 내장 함수
# 매개변수 x, 리턴 x
def [함수이름]:
함수호출시 실행내용
# 매개변수 x, 리턴 o
def [함수이름]:
함수호출시 실행내용
return 리턴문장
# 매개변수 o, 리턴 x
def [함수이름(매개변수)]:
함수호출시 매개변수를 활용하는 실행내용
# 매개변수 o, 리턴 o
def [함수이름(매개변수)]:
함수호출시 매개변수를 활용하는 실행내용
return 리턴문장ex01_function_basic.py
def hello():
print("안녕하세요1")
hello()ex02_function_return.py
def hello():
# return "안녕하세요"
hello = "안녕하세요"
return hello
# print(hello())
return_var = hello()
print(return_var)ex03_function_param.py
def hello(h):
print(h)
# hello("안녕하세요")
param_var = "안녕하세요"
hello(param_var)ex04_function_param_return.py
def hello(h):
return_value = h + "반갑습니다"
return return_value
param_var = "안녕하세요"
result = hello(param_var)
print(result)
💡 이번 차시의 학습목표
✔ 이전 차시에서 진행한 예제를 활용하여 다양한 방법으로 함수로 구성하기
ex01_1to100sum_function_01.py
def sum1():
sum = 0
for i in range(1,101):
if i%3 == 0:
print(i)
sum += i
print("1부터 100까지 3의배수 합은",sum,"입니다")
# 함수호출
sum1()ex01_1to100sum_function_02.py
def sum2(num):
sum = 0
for i in range(1,num+1):
if i%3 == 0:
print(i)
sum += i
print("1부터 ",num,"까지 3의배수 합은",sum,"입니다")
num2 = input("숫자를 입력하세요: ")
num2 = int(num2)
sum2(num2)ex01_1to100sum_function_03.py
def sum3(num):
sum = 0
for i in range(1,num+1):
if i%3 == 0:
print(i)
sum += i
return sum
num3 = input("숫자를 입력하세요: ")
num3 = int(num3)
result3 = sum3(num3)
print("1부터 ",num3,"까지 3의배수 합은",result3,"입니다")
ex02_findname_function_01.py

def findname1():
    names1 = ["김파이", "이파이", "박파이", "최파이"]
    search_name1 = input("찾아볼 이름을 입력하세요:")
    if search_name1 in names1:
        print("찾는 이름이 있습니다.")
        print(names1.index(search_name1))
    else:
        print("찾는 이름이 없습니다.")

findname1()ex02_findname_function_02.py
def findname2(name2):
names2 = ["김파이", "이파이", "박파이", "최파이"]
if name2 in names2:
print("찾는 이름이 있습니다.")
print(names2.index(search_name2))
else:
print("찾는 이름이 없습니다.")
search_name2 = input("찾아볼 이름을 입력하세요:")
findname2(search_name2)ex02_findname_function_03.py
def findname3(name3, names3):
if name3 in names3:
print("찾는 이름이 있습니다.")
print(names3.index(search_name3))
else:
print("찾는 이름이 없습니다.")
names3 = ["김파이", "이파이", "박파이", "최파이"]
search_name3 = input("찾아볼 이름을 입력하세요:")
findname3(search_name3, names3)
💡 이번 차시의 학습목표
✔ 파이썬 모듈 이해하기
✔ 파이썬 모듈 사용하기
ex01_main.py

def hello():
    print("안녕하세요")

hello()ex02_main.py
import ex02_function as ex
# hello() # 오류
# ex02_function.hello()
ex.hello()
ex02_function.py
def hello():
print("안녕하세요")ex03_functions.py
def hello1():
print("안녕하세요. hello1")
def hello2():
print("안녕하세요. hello2")
ex03_main.py
import ex03_functions
# hello1() # 오류
ex03_functions.hello1()
ex03_functions.hello2()ex04_functions.py
def hello1():
print("안녕하세요. hello1")
def hello2():
print("안녕하세요. hello2")
ex04_main.py
from ex03_functions import hello1
hello1()
# hello2() # 오류ex05_functions.py
def hello1():
print("안녕하세요. hello1")
def hello2():
print("안녕하세요. hello2")
ex05_main.py
from ex05_functions import *
hello1()
hello2()
| [Python] 유튜브 크롤링(1) (0) | 2024.03.19 |
|---|---|
| [Python] Selenium 소개 및 사용법 (0) | 2024.03.18 |
| [Python] 패키지 설치 및 numpy, matplotlib 기초 (0) | 2024.03.15 |
| [Python] 조건문과 반복문 (0) | 2024.03.08 |
| [Python] 파이썬 기본 문법 (0) | 2024.01.30 |