ch17 유튜브 크롤링-스크롤 제어
💡 이번 차시의 학습목표
✔ 현재 창의 높이 확인하기 위한 javascript 문법
✔ 스크롤을 제어하기 위한 javascript 문법
✔ selenium으로 javascript 문법 활용하여 스크롤 제어 하기
01. 스크롤 작업의 필요성
- 유튜브 홈페이지 또는 검색결과 페이지에는 모든 영상 콘텐츠가 한번에 노출되지 않음
- 스크롤을 내리는 과정에서 스크롤바가 페이지의 맨 하단까지 내려가게 되면 약간의 로딩 후 다음 영상 목록이 추가됨
- 영상 목록이 더 이상 추가되지 않을 때까지 내리기 위해선 스크롤을 계속해서 내려야 하는 노력과 시간 필요
- selenium, javascript 문법을 활용하여 모든 영상의 목록이 나올 때 까지 스크롤할 수 있도록 개발
02. 현재 열려있는 페이지의 높이 확인
- 브라우저에서 개발자도구 열고 Console 탭 열기
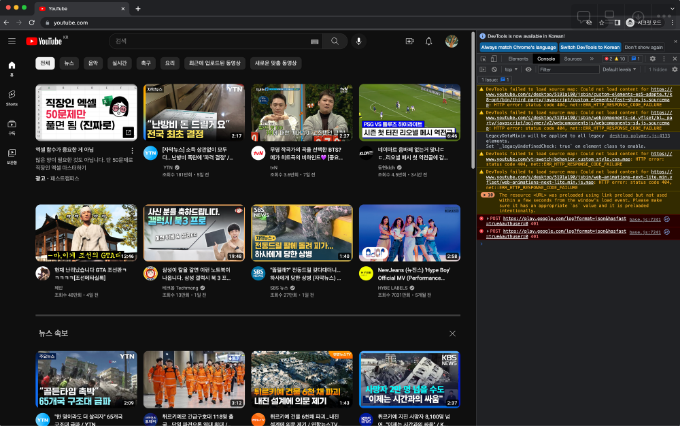
- 아래 코드 입력 후 결과 확인 (출력 숫자값은 다를 수 있음)
- 현재 브라우저에 열려 있는 페이지의 높이값을 가져오는 javascript 문법
document.documentElement.scrollHeight
- 현재 브라우저에 열려 있는 페이지의 높이값을 가져오는 javascript 문법
- 스크롤을 제일 하단으로 내린 뒤 위의 코드 다시 입력 후 확인

03. selenium으로 페이지 높이 가져오는 내용 구현
- execute_script() method
- javascript 문법을 실행할 수 있도록 하는 method
- 매개값으로 javascript 코드 작성
- 페이지 높이 가져오는 문법 적용
driver.execute_script("document.documentElement.scrollHeight") - 앞의 문장으로는 확인할 수 있는 내용은 없으며, 파이썬 변수로 담아서 print() 수행하기 위한 코드로 수정
- return 이 추가된 이유는 javascript 문장을 수행후 반환되는 값을 가져오기 위함
- 반환값을 h1 변수에 담고 print()로 확인
h1 = driver.execute_script("return document.documentElement.scrollHeight") print(h1)
03-1. 실습 예제
📥실습 코드
ex01_scroll.py

from selenium import webdriver

driver = webdriver.Chrome()
driver.get("<https://www.youtube.com/>")
# driver.execute_script("document.documentElement.scrollHeight")
h1 = driver.execute_script("return document.documentElement.scrollHeight")
print(h1)
04. 스크롤 내리기
- 개발자 도구 Console 열기
- 스크롤을 제어하기 위한 javascript 문법
- 브라우저에 대한 제어가 필요하기 때문에 window 객체 사용
- scrollTo(x, y): 지정한 가로(x), 세로(y)위치로 스크롤을 이동시키는 함수
- 가로 스크롤은 0으로 고정 시키며, 세로 스크롤 값을 조정
- 아래와 같은 값을 console에 입력 후 각각 실행하며 스크롤의 위치 변화 확인
window.scrollTo(0, 30)
window.scrollTo(0, 100)
window.scrollTo(0, 1000)
- 스크롤을 가장 하단으로 내리기
- 현재 열려있는 페이지의 높이만큼 스크롤을 내리도록 함
- 세로 값을 현재 열려있는 페이지 높이로 지정
window.scrollTo(0, document.documentElement.scrollHeight)
- 세로 값을 현재 열려있는 페이지 높이로 지정
- 현재 열려있는 페이지의 높이만큼 스크롤을 내리도록 함
05. selenium으로 스크롤 내리기 구현
- javascript 문법 사용을 위해 execute_script() 사용
- 유튜브 홈페이지 접속 후 페이지 높이 확인 후, 페이지 높이만큼 스크롤을 내리기 위한 함수 실행
# 처음 페이지 높이 가져오기
h1 = driver.execute_script("return document.documentElement.scrollHeight")
print(h1)
# 페이지 높이 만큼 스크롤 내리기
driver.execute_script("window.scrollTo(0, document.documentElement.scrollHeight)")
- 유튜브 홈페이지 접속 후 페이지 높이 확인 후, 페이지 높이만큼 스크롤을 내리기 위한 함수 실행
- 같은 동작 2번 더 실행 후 콘솔에 출력된 페이지 높이값이 점점 증가하는지 확인
- 스크롤을 내리는데에 약간의 로딩시간이 필요하므로 스크롤 내린 뒤 time.sleep 을 활용하여 2초의 대기시간 추가
# 처음 페이지 높이 가져오기
h1 = driver.execute_script("return document.documentElement.scrollHeight")
print(h1)
# 페이지 높이 만큼 스크롤 내리기
driver.execute_script("window.scrollTo(0, document.documentElement.scrollHeight)")
# 약간의 로딩시간
time.sleep(2)
# 스크롤을 한 번 내린 뒤의 페이지 높이 가져오기
h2 = driver.execute_script("return document.documentElement.scrollHeight")
print(h2)
# 두번째 스크롤 내리는 동작
driver.execute_script("window.scrollTo(0,document.documentElement.scrollHeight)")
time.sleep(2)
# 두 번 스크롤 내린 뒤의 페이지 높이 가져오기
h3 = driver.execute_script("return document.documentElement.scrollHeight")
print(h3)
time.sleep(3)
- 스크롤을 내리는데에 약간의 로딩시간이 필요하므로 스크롤 내린 뒤 time.sleep 을 활용하여 2초의 대기시간 추가
05-1. 실습 예제
📥실습 코드
ex02_scroll.py

from selenium import webdriver
import time

driver = webdriver.Chrome()
driver.get("<https://www.youtube.com/>")

# 처음 페이지 높이 가져오기
h1 = driver.execute_script("return document.documentElement.scrollHeight")
print(h1)
# 페이지 높이 만큼 스크롤 내리기
driver.execute_script("window.scrollTo(0, document.documentElement.scrollHeight)")
# 약간의 로딩시간
time.sleep(2)
# 스크롤을 한 번 내린 뒤의 페이지 높이 가져오기
h2 = driver.execute_script("return document.documentElement.scrollHeight")
print(h2)
# 두번째 스크롤 내리는 동작
driver.execute_script("window.scrollTo(0,document.documentElement.scrollHeight)")
time.sleep(2)
# 두 번 스크롤 내린 뒤의 페이지 높이 가져오기
h3 = driver.execute_script("return document.documentElement.scrollHeight")
print(h3)
time.sleep(3)
ch18 유튜브 크롤링-무한 스크롤
💡 이번 차시의 학습목표
✔ 무한 스크롤을 이용하여 유튜브 영상 목록을 모두 불러옴
✔ 영상의 제목 크롤링
01. 무한 스크롤 동작을 위한 방법
- 유튜브 홈페이지 접속 후 모든 영상목록을 보려면 스크롤을 계속해서 내려야 모든 영상을 불러올 수 있음
- 하지만 검색어에 따라 영상의 갯수는 다르기 때문에 몇 회를 반복하거나 몇 분 동안 반복하는 방식은 적절하지 않음
- 페이지 높이를 확인하는 방식을 이용하여 스크롤 수행하는 절차
- 스크롤 수행 전 높이 확인
- 스크롤 한 번 수행
- 스크롤 수행 후 페이지의 높이와 스크롤 수행 전 페이지의 높이 비교
- 스크롤 수행 후의 페이지 높이가 크면 스크롤 수행
- 두 값이 일치한다면 스크롤 중단
02. 무한 스크롤 코드 구현하기
- 스크롤은 계속 반복적으로 수행되어야 하기 때문에 반복문 활용
- 횟수가 정해져 있지 않으므로 while문 활용
while True: # 반복문 내용 - 스크롤을 수행하기 전 페이지의 높이 가져오기
- before_scroll_height = driver.execute_script("return document.documentElement.scrollHeight")
- 페이지 높이만큼 스크롤 내리기
- driver.execute_script("window.scrollTo(0, document.documentElement.scrollHeight)")
- 스크롤 수행 후 페이지 높이 가져오기
- after_scroll_height = driver.execute_script("return document.documentElement.scrollHeight")
- 스크롤 수행 전, 후 페이지 높이 비교
- 높이가 동일하면 더이상 스크롤이 내려갈 수 없다 판단하여 while문 종료
if before_scroll_height == after_scroll_height:
        break
02-1. 실습 코드
<aside> 📌 실습코드는 코드박스에서 확인해주세요!
</aside>
- 스크롤을 내린 후 2초씩의 대기 시간을 적용함
- 모든 스크롤이 내려갔는지 확인을 위해 while문 종료 후 10초의 대기시간 적용
📥실습 코드
ex01_scroll.py

from selenium import webdriver
import time

driver = webdriver.Chrome()
driver.get("<https://www.youtube.com/>")

while True:
    before_scroll_height = driver.execute_script("return document.documentElement.scrollHeight")
    driver.execute_script("window.scrollTo(0, document.documentElement.scrollHeight)")
    time.sleep(2)
    after_scroll_height = driver.execute_script("return document.documentElement.scrollHeight")
    time.sleep(2)
    if before_scroll_height == after_scroll_height:
        break
    # else:
    #     before_scroll_height = after_scroll_height

time.sleep(10)
03. 스크롤 완료 후 영상의 제목만 가져오기
- find_elements() 를 활용하여 제목을 가져온 뒤 for문으로 출력
- 제목 가져오는 방법은 이전 차시에서 배웠던 방식과 동일함
- 영상 갯수 확인을 위해 len() 함수 활용
titles = driver.find_elements(By.XPATH, '//*[@id="video-title"]')
print("영상 갯수: ", len(titles))
for title in titles:
    print(title.text)
04. 무한 스크롤 코드 함수화하기
- 스크롤 부분만 함수로 정의
ex02_scroll_function_01.py from selenium import webdriver import time from selenium.webdriver.common.by import By driver = webdriver.Chrome() driver.get("https://www.youtube.com/") def scroll(): while True: before_scroll_height = driver.execute_script("return document.documentElement.scrollHeight") driver.execute_script("window.scrollTo(0, document.documentElement.scrollHeight)") time.sleep(2) after_scroll_height = driver.execute_script("return document.documentElement.scrollHeight") time.sleep(2) if before_scroll_height == after_scroll_height: break time.sleep(2) scroll() titles = driver.find_elements(By.XPATH, '//*[@id="video-title"]') print("영상 갯수: ", len(titles)) for title in titles: print(title.text) - 스크롤 후 제목 list 반환하는 내용을 함수로 정의
ex02_scroll_function_02.py

from selenium import webdriver
import time
from selenium.webdriver.common.by import By

driver = webdriver.Chrome()
driver.get("https://www.youtube.com/")

def scroll():
    while True:
        before_scroll_height = driver.execute_script("return document.documentElement.scrollHeight")
        driver.execute_script("window.scrollTo(0, document.documentElement.scrollHeight)")
        time.sleep(2)
        after_scroll_height = driver.execute_script("return document.documentElement.scrollHeight")
        time.sleep(2)
        if before_scroll_height == after_scroll_height:
            break
    time.sleep(2)
    titles = driver.find_elements(By.XPATH, '//*[@id="video-title"]')
    print("영상 갯수: ", len(titles))
    return titles

titles = scroll()

for title in titles:
    print(title.text)
ch19 유튜브 크롤링-검색 필터링
💡 이번 차시의 학습목표
✔ 인기급상승 동영상 제목 크롤링
✔ 검색어 입력 후 필터 적용하여 제목 크롤링
01. 유튜브 인기급상승 페이지 영상 제목 크롤링
- 접속 주소: 🌐 https://www.youtube.com/feed/trending
- 이전 차시에서 진행한 코드에서 주소만 적용하여 진행 가능
ex01_trending.py

from selenium import webdriver
import time
from selenium.webdriver.common.by import By

driver = webdriver.Chrome()
driver.get("https://www.youtube.com/feed/trending")

def scroll():
    while True:
        before_scroll_height = driver.execute_script("return document.documentElement.scrollHeight")
        driver.execute_script("window.scrollTo(0, document.documentElement.scrollHeight)")
        time.sleep(2)
        after_scroll_height = driver.execute_script("return document.documentElement.scrollHeight")
        time.sleep(2)
        if before_scroll_height == after_scroll_height:
            break
    time.sleep(2)
    titles = driver.find_elements(By.XPATH, '//*[@id="video-title"]')
    print("영상 갯수: ", len(titles))
    return titles

titles = scroll()

for title in titles:
    print(title.text)
02. 유튜브 검색 결과 조회수순 필터링을 위한 요소 확인하기
- 유튜브 검색화면 살펴보기
- 검색 결과 화면에서 아래 그림과 같이 ‘필터’를 클릭하면 업로드 날짜, 구분, 길이, 정렬기준 등을 선택할 수 있는 메뉴가 노출됨
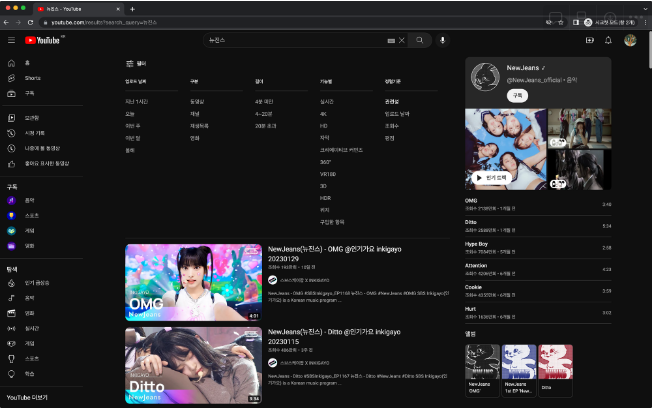
- 정렬기준의 조회수를 클릭하면 검색 결과가 조회수가 높은순으로 영상목록 정렬됨

- 검색 결과 화면에서 아래 그림과 같이 ‘필터’를 클릭하면 업로드 날짜, 구분, 길이, 정렬기준 등을 선택할 수 있는 메뉴가 노출됨
- 앞서 진행한 방법을 selenium으로 구현하기 위해 필터, 조회수 클릭 요소 살펴보기
- 필터 버튼 요소 확인하기
- ‘**개발자도구’**를 열고 필터 버튼의 요소 확인
- 복사한 요소
<ytd-toggle-button-renderer align-by-text="" class="style-scope ytd-search-sub-menu-renderer" button-renderer="true"><yt-button-shape><button class="yt-spec-button-shape-next yt-spec-button-shape-next--text yt-spec-button-shape-next--mono yt-spec-button-shape-next--size-m yt-spec-button-shape-next--icon-leading yt-spec-button-shape-next--align-by-text " aria-pressed="false" aria-label="검색 필터" style=""><div class="yt-spec-button-shape-next__icon" aria-hidden="true"><yt-icon style="width: 24px; height: 24px;"><svg viewBox="0 0 24 24" preserveAspectRatio="xMidYMid meet" focusable="false" class="style-scope yt-icon" style="pointer-events: none; display: block; width: 100%; height: 100%;"><g class="style-scope yt-icon"><path d="M15,17h6v1h-6V17z M11,17H3v1h8v2h1v-2v-1v-2h-1V17z M14,8h1V6V5V3h-1v2H3v1h11V8z M18,5v1h3V5H18z M6,14h1v-2v-1V9H6v2H3v1 h3V14z M10,12h11v-1H10V12z" class="style-scope yt-icon"></path></g></svg><!--css-build:shady--></yt-icon></div><div class="cbox yt-spec-button-shape-next--button-text-content"><span class="yt-core-attributed-string yt-core-attributed-string--white-space-no-wrap" role="text">필터</span></div><yt-touch-feedback-shape style="border-radius: inherit;"><div class="yt-spec-touch-feedback-shape yt-spec-touch-feedback-shape--touch-response" aria-hidden="true"><div class="yt-spec-touch-feedback-shape__stroke" style=""></div><div class="yt-spec-touch-feedback-shape__fill" style=""></div></div></yt-touch-feedback-shape></button></yt-button-shape> <tp-yt-paper-tooltip fit-to-visible-bounds="" offset="8" role="tooltip" tabindex="-1" style="inset: 60px auto auto 7px;"><!--css-build:shady--><div id="tooltip" class="style-scope tp-yt-paper-tooltip hidden" style-target="tooltip"> 검색 필터 열기 </div> </tp-yt-paper-tooltip> </ytd-toggle-button-renderer>
- 필터에서 조회수 요소 확인하기
- 개발자도구에서 확인
- 복사한 요소
<a id="endpoint" class="yt-simple-endpoint style-scope ytd-search-filter-renderer" href="/results?search_query=%EB%89%B4%EC%A7%84%EC%8A%A4&sp=CAM%253D"> <div id="label" class="style-scope ytd-search-filter-renderer" title="조회수순 정렬"> <yt-formatted-string class="style-scope ytd-search-filter-renderer">조회수</yt-formatted-string> <yt-icon id="dismiss-x" icon="yt-icons:dismissal" class="style-scope ytd-search-filter-renderer"><svg viewBox="0 0 24 24" preserveAspectRatio="xMidYMid meet" focusable="false" class="style-scope yt-icon" style="pointer-events: none; display: block; width: 100%; height: 100%;"><g class="style-scope yt-icon"><path d="M12.7,12l6.6,6.6l-0.7,0.7L12,12.7l-6.6,6.6l-0.7-0.7l6.6-6.6L4.6,5.4l0.7-0.7l6.6,6.6l6.6-6.6l0.7,0.7L12.7,12z" class="style-scope yt-icon"></path></g></svg><!--css-build:shady--></yt-icon> </div> </a>
- 필터 버튼 요소 확인하기

03. selenium으로 검색 결과에서 조회수순 정렬 과정 구현하기
- selenium으로 필터 버튼 클릭하기
- 필터 버튼의 xpath 복사하여 find_element() 로 접근
- 가져온 요소 click() 으로 클릭
# 영상에서의 코드
filter_button = driver.find_element(By.XPATH, '//*[@id="container"]/ytd-toggle-button-renderer')

# 수정된 코드
filter_button = driver.find_element(By.XPATH, '//*[@id="filter-button"]')

filter_button.click()
- selenium으로 조회수 클릭하기
- 조회수의 full xpath 복사하여 find_element() 로 접근
- 관련성, 업로드날짜, 조회수, 평점이 모두 같은 xpath, css_selector값을 갖고 있어 구분이 제대로 되지 않아 full xpath 복사하여 사용
- 가져온 요소 click() 으로 클릭
# 영상에서의 코드
hits_button = driver.find_element(By.XPATH, '/html/body/ytd-app/div[1]/ytd-page-manager/ytd-search/div[1]/ytd-two-column-search-results-renderer/div/ytd-section-list-renderer/div[1]/div[2]/ytd-search-sub-menu-renderer/div[1]/iron-collapse/div/ytd-search-filter-group-renderer[5]/ytd-search-filter-renderer[3]/a')

# 수정된 코드
hits_button = driver.find_element(By.XPATH, '/html/body/ytd-app/ytd-popup-container/tp-yt-paper-dialog/ytd-search-filter-options-dialog-renderer/div[2]/ytd-search-filter-group-renderer[5]/ytd-search-filter-renderer[3]/a')

hits_button.click()
- 조회수의 full xpath 복사하여 find_element() 로 접근
04. 정렬된 결과에서 무한 스크롤 수행 후 영상 제목 크롤링 수행
05. 실습 예제
<aside> 📌 실습코드는 코드박스에서 확인해주세요!
</aside>
📥실습 코드
ex02_search_filter.py

from selenium import webdriver
from selenium.webdriver.common.by import By
from selenium.webdriver.common.keys import Keys
import time

def scroll():
    while True:
        before_scroll_height = driver.execute_script("return document.documentElement.scrollHeight")
        driver.execute_script("window.scrollTo(0, document.documentElement.scrollHeight)")
        time.sleep(2)
        after_scroll_height = driver.execute_script("return document.documentElement.scrollHeight")
        time.sleep(2)
        if before_scroll_height == after_scroll_height:
            break
    time.sleep(2)
    titles = driver.find_elements(By.XPATH, '//*[@id="video-title"]')
    print("영상 갯수: ", len(titles))
    return titles

# 브라우저 실행
driver = webdriver.Chrome()
driver.get("<https://www.youtube.com/>")
search_input = driver.find_element(By.CSS_SELECTOR, "input#search")
search_input.send_keys("뉴진스")
# 검색버튼 클릭
search_button = driver.find_element(By.CSS_SELECTOR, "button#search-icon-legacy")
search_button.click()
time.sleep(2)
# 필터버튼 클릭
filter_button = driver.find_element(By.XPATH, '//*[@id="container"]/ytd-toggle-button-renderer')
filter_button.click()
time.sleep(2)
# 조회수 클릭
hits_button = driver.find_element(By.XPATH, '/html/body/ytd-app/div[1]/ytd-page-manager/ytd-search/div[1]/ytd-two-column-search-results-renderer/div/ytd-section-list-renderer/div[1]/div[2]/ytd-search-sub-menu-renderer/div[1]/iron-collapse/div/ytd-search-filter-group-renderer[5]/ytd-search-filter-renderer[3]/a')
hits_button.click()
time.sleep(2)
# 무한 스크롤 함수 호출
titles = scroll()

for title in titles:
    print(title.text)
ch20 유튜브 크롤링-검색 및 스크롤 적용
💡 이번 차시의 학습목표
✔ 인기급상승 동영상을 크롤링하여 제목, 조회수 출력하기
✔ 제목, 조회수 따로 리스트에 저장하기
01. 조회수 값 가져오기
- 조회수 표현 요소 확인
- 아래 그림과 같이 영상 제목 요소의 a태그 aria-label 속성에서 조회수 값을 확인할 수 있음

- aria-label 속성 값
- 다나카 초대석 게시자: 침착맨 1일 전 50분 조회수 939,511회
- 조회수 값만 표현하는 부분이 없기 때문에 위의 텍스트에서 조회수 숫자만 따로 가져와야 함
- 아래 그림과 같이 영상 제목 요소의 a태그 aria-label 속성에서 조회수 값을 확인할 수 있음
- 조회수 값을 가져오기 위한 과정</aside>
- rfind() method 활용
- 해당 변수의 마지막에서 찾기 시작하여 매개변수로 지정한 값이 시작되는 인덱스 값을 반환해줌
- find() method는 앞에서부터 찾기 때문에 제목에 ‘조회수’라는 글자가 포함된 경우라면 다른 결과가 나올 수 있음
- 조회수 텍스트가 있는 인덱스 찾기
hits_text.rfind("조회수")
- 해당 변수의 마지막에서 찾기 시작하여 매개변수로 지정한 값이 시작되는 인덱스 값을 반환해줌
- 조회수 값 시작 인덱스 찾기
- 조회수로 부터 4번째 인덱스 부터 조회수 값이 작성되어 있음.
hits_text.find("조회수")+4
- 조회수로 부터 4번째 인덱스 부터 조회수 값이 작성되어 있음.
- 조회수 값 마지막 인덱스 찾기
- ‘회’라는 글자 앞까지가 조회수값이 끝나는 인덱스
hits_text.find("회")
- ‘회’라는 글자 앞까지가 조회수값이 끝나는 인덱스
- 시작인덱스, 끝 인덱스 값을 활용하여 조회수 숫자만 가져오기
start_index = hits_text.rfind("조회수")+4 end_index = hits_text.rfind("회") print(hits_text[start_index:end_index]) - 구분자 쉼표 제거 후 정수로 변환
- 조회수순 정렬 등을 위해선 정수형태의 자료형으로 변환 필요
hits = hits_text[start_index:end_index]
hits = int(hits.replace(",", ""))
- 조회수순 정렬 등을 위해선 정수형태의 자료형으로 변환 필요
- rfind() method 활용
02. 크롤링 코드에 적용하기
- 제목, 조회수를 담을 리스트 각각 선언
hits_list = [] title_list = [] - aria-label 속성값 가져오기
hits_text = element.get_attribute("aria-label") - 인기급상승 Shorts 의 경우 구조가 달라서 제외
- 제외하기 위해 조건문 활용
if element.get_attribute("aria-label"):
- 제외하기 위해 조건문 활용
- 조회수 값을 가져오기 위한 코드
- 조회수 값을 추출한 뒤 제목, 조회수 값을 각각 리스트에 저장
hits_text = element.get_attribute("aria-label")
start_index = hits_text.rfind("조회수")+4
end_index = hits_text.rfind("회")
hits = hits_text[start_index:end_index]
hits = int(hits.replace(",", ""))
title_list.append(element.text)
hits_list.append(hits)
- 조회수 값을 추출한 뒤 제목, 조회수 값을 각각 리스트에 저장
- 완료 후 출력하여 확인
- 두 개 리스트를 동시에 반복문으로 사용하기 위해 zip() 활용
for title, hits in zip(title_list, hits_list):
    print(title, hits)
- 두 개 리스트를 동시에 반복문으로 사용하기 위해 zip() 활용
'Python' 카테고리의 다른 글
| [Python] konlpy 형태소 분석 (0) | 2024.03.22 |
|---|---|
| [Python] 판다스 Pandas (1) | 2024.03.21 |
| [Python] 유튜브 크롤링(1) (0) | 2024.03.19 |
| [Python] Selenium 소개 및 사용법 (0) | 2024.03.18 |
| [Python] 패키지 설치 및 numpy, matplotlib 기초 (0) | 2024.03.15 |